Accurate temperature readings are crucial for maintaining a comfortable living or working environment. A thermostat that is not calibrated correctly can lead to rooms being too hot or too cold, resulting in discomfort and potentially higher energy bills. Here is a step - by - step guide on how to calibrate your thermostat to ensure precise temperature control.
1. Preparation
1.1 Gather the Necessary Tools
Before starting the calibration process, you need to gather a few essential tools. A calibrated thermometer is the most important tool. Digital thermometers are often more accurate and easier to read than analog ones. Make sure the thermometer has a wide enough temperature range to cover the settings on your thermostat. You may also need a screwdriver, depending on the type of thermostat you have. Some thermostats require you to remove screws to access the calibration settings.
1.2 Identify Your Thermostat Type
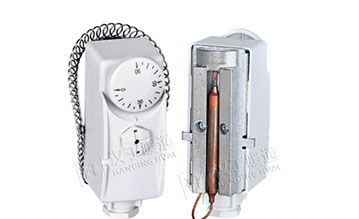
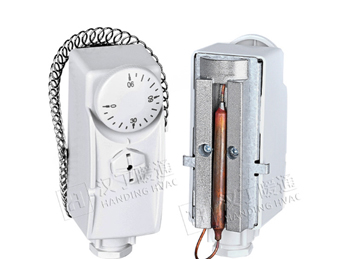
There are different types of thermostats, including mechanical, digital, and smart thermostats. Each type has a slightly different calibration process. Mechanical thermostats usually have a calibration screw that you can adjust manually. Digital thermostats often have a menu - based system for calibration, and smart thermostats can sometimes be calibrated through a mobile app or their built - in interface. Understanding the type of thermostat you have will help you navigate the calibration process more effectively.
2. Calibration Steps
2.1 Set the Thermostat to a Known Temperature
First, set your thermostat to a specific temperature. For example, if it's a heating - only thermostat, set it to a temperature that you know is comfortable, such as 21°C (70°F). Wait for a sufficient amount of time, usually around 15 - 30 minutes, to allow the room temperature to stabilize. This ensures that the reading you take is accurate and represents the actual temperature the thermostat is trying to maintain.
2.2 Measure the Actual Temperature
Place the calibrated thermometer in the room, preferably at the same height as the thermostat and in a location away from direct sunlight, drafts, or heat sources. After the waiting period, read the temperature on the thermometer. Compare this measured temperature with the set temperature on the thermostat. If the measured temperature is different from the set temperature, calibration is necessary.
2.3 Adjust the Thermostat
Mechanical Thermostats: Locate the calibration screw on the thermostat. If the measured temperature is higher than the set temperature, turn the calibration screw counter - clockwise slightly. If the measured temperature is lower, turn the screw clockwise. Make small adjustments, usually no more than a quarter - turn at a time. After each adjustment, wait for a few minutes and then re - measure the temperature to see if the calibration is improving.
Digital Thermostats: Navigate to the calibration menu on the thermostat. This may involve pressing a series of buttons or using an arrow - key pad. In the menu, you can usually enter a positive or negative adjustment value. For example, if the measured temperature is 2°C higher than the set temperature, you would enter a negative 2 in the calibration field. Save the new settings and re - measure the temperature after a short period.
Smart Thermostats: For smart thermostats, open the associated mobile app or access the device's web interface. Look for the calibration section in the settings. The process is similar to digital thermostats, where you can enter an adjustment value based on the difference between the measured and set temperatures. Some smart thermostats also have auto - calibration features that can be activated, which use data from multiple sensors to adjust the temperature settings automatically.
3. Re - checking and Fine - tuning
After making the initial adjustment, wait for another 15 - 30 minutes and re - measure the temperature. The goal is to get the measured temperature as close as possible to the set temperature on the thermostat. If there is still a significant difference, repeat the adjustment process. Keep in mind that small differences of around 0.5 - 1°C may be acceptable due to the margin of error in both the thermometer and the thermostat.
4. Special Considerations
4.1 Seasonal Calibration
Thermostats may need to be calibrated differently depending on the season. For example, during the summer months, when the air - conditioning is in use, the calibration may need to be adjusted slightly compared to the winter when heating is the primary function. This is because the heat - transfer characteristics of the building and the operation of the HVAC system can change with the season.
4.2 Multiple Thermostats in a Building
In a multi - zone building with multiple thermostats, it's important to calibrate each thermostat individually. The temperature distribution in different parts of the building may vary, so each thermostat needs to be adjusted to accurately reflect the temperature in its respective zone. Additionally, if the building has a central HVAC system, the calibration of individual thermostats should be coordinated to ensure efficient operation of the entire system.
In conclusion, calibrating your thermostat is a relatively simple process that can significantly improve the accuracy of temperature control in your home or workplace. By following these steps and considering the special factors, you can ensure a comfortable environment and potentially save on energy costs. Regular calibration, at least once or twice a year, is recommended to maintain the optimal performance of your thermostat.
 January 21, 2025